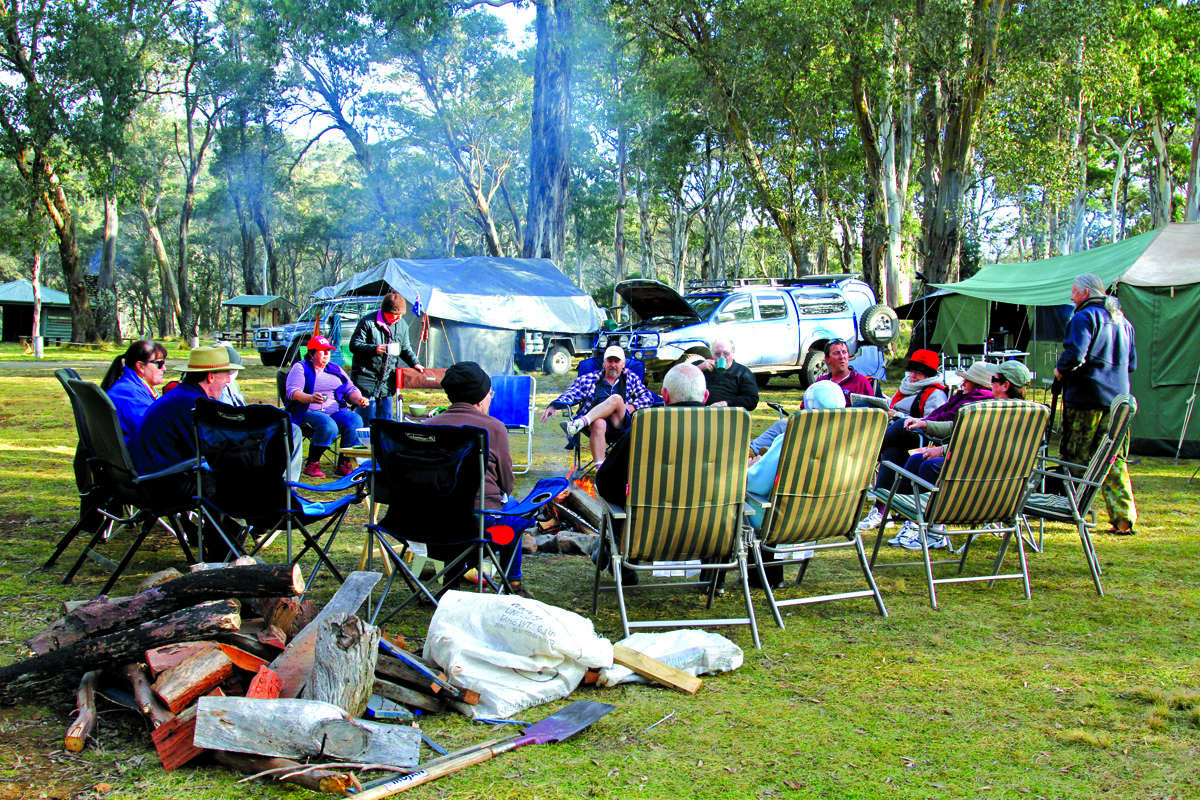
We go camping for many reasons, but one of the principle motives is to seek the peace and quiet of the bush. We’ll tolerate the noise of our kids running around enjoying themselves, and somewhat less of the same from other people’s children, but cranking up a chainsaw or a generator, even at midday, justifiably gets some stern looks, muttered expletives and a grudging allocation of forbearance.
So how about if we fire up a jackhammer?
This may sound a little extreme for your average camper trailer, but it’s pretty much what you get from many 12 volt electric water pumps.


In this day and age of “must-have” luxuries, the very notion of a manually operated water pump is just not on. Imagine having to exert physical energy to extract water from inside that tank!
For most these days we want only the nicest of mixer taps, just like the kitchen at home; behind the scenes, out of our way, we want the application of that electrical force to provoke a little rubber diaphragm to push the water along.
But so often that plumbing magic is accompanied by a machine-gun hammering sound that threatens to rattle the kitchen slides and frighten off the kookaburras.
The really considerate among our campers afflicted by this nuisance take to filling their kettle last thing before they go to bed at night so that it’s ready to make a cup of tea or coffee on the cooktop at 6:30 or seven in the morning when they arise.
Too often, however, it results in the beginning of what sounds more like a Chicago prohibition era shootout among the speakeasies than the start of a new day among the gum trees.
STEPS TO SILENCE
So what can we do about it? Well, quite surprisingly, there is a bit that can be done, quite cheaply and easily, that ought to make a big difference to your auditory footprint.
Simply put, that machine gun hammering is a consequence, most of the time, of a series of concurrent smaller sounds that result from pressure waves in the pipes and/or hoses leading to and from your pump. It’s a result of the pump overcoming the inertia of the water columns in the two sets – inlet and outlet – of piping. Try explaining that at 6am to a bleary-eyed stranger demanding a few extra hours of sleep.
As many pump manufacturers say, no pump should be noisy. If it is, it’s a result of poor or incorrect mounting or set-up.
So, what are the golden rules for fixing this issue?
- Tap the surface on which the pump is mounted with your knuckles. If it responds like a drum then it’s going to act like a drum, enhancing and amplifying the hammering effect of the water pulses. Aussie Swag campers had this as a problem for some time about a decade ago. Their water pump line ran across under the bottom of the kitchen, which was simply a thin outer metal skin to keep the dust and bugs out, but it was a wonderful drum. After numerous attempts to solve the matter, mounting pumps on rubber and all sorts of things, it was found that simply separating the water line from the skin of the kitchen base solved the issue. If necessary remount the water pump on a more solid surface.
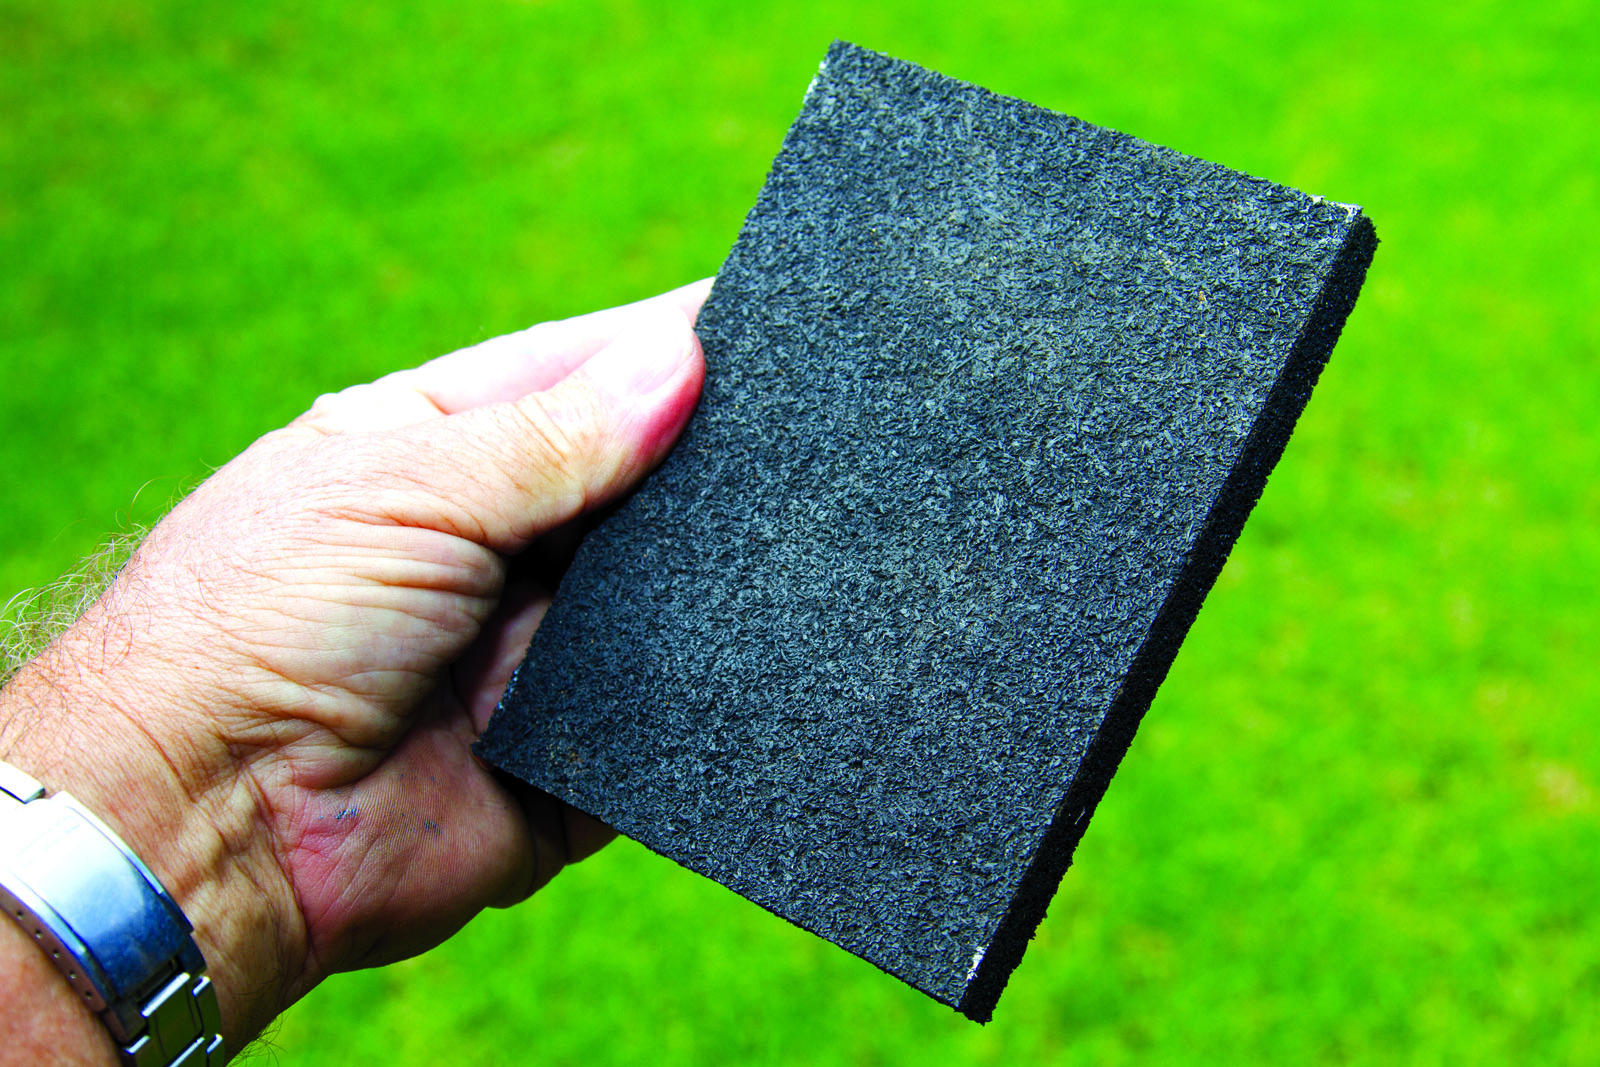
- Place a piece of carpet, or, better still, a layer of heavy duty closed cell foam rubber between the pump and its mounting surface.
- If you can, put a layer of carpet under the heads of the mounting bolts to further insulate them from the surface.
- Avoid overtightening the mounting bolts and nuts. Your pump will have come with soft plastic or rubber mounting feet with the intent that they can absorb some of the vibrations. You should have enhanced this with your own rubber matting and/or carpet layers. By doing up the nuts and bolts too tightly you merely compress these materials so that they become hard and return to transmitting the vibrations. Make sure you use nyloc nuts and do them up only tight enough to stop any movement or rattling of the pump. Use the thinnest screws/bolts that you can get away with. Quite possibly these will be the ones supplied with the pump, but do not increase the diameter of the bolts’ or screws’ shank.
- Avoid the use of elbow fittings close to the outlet side of the pump. These create turbulence in the water and back-pressure, both of which will create noise. Use smooth curves rather than elbows.
- If you have a water line passing through a wall or floor make sure it can’t rattle. Use foam rubber or insulation to cushion the gap between the hose and the wall/floor, or a quality gland to hold the hose firmly.
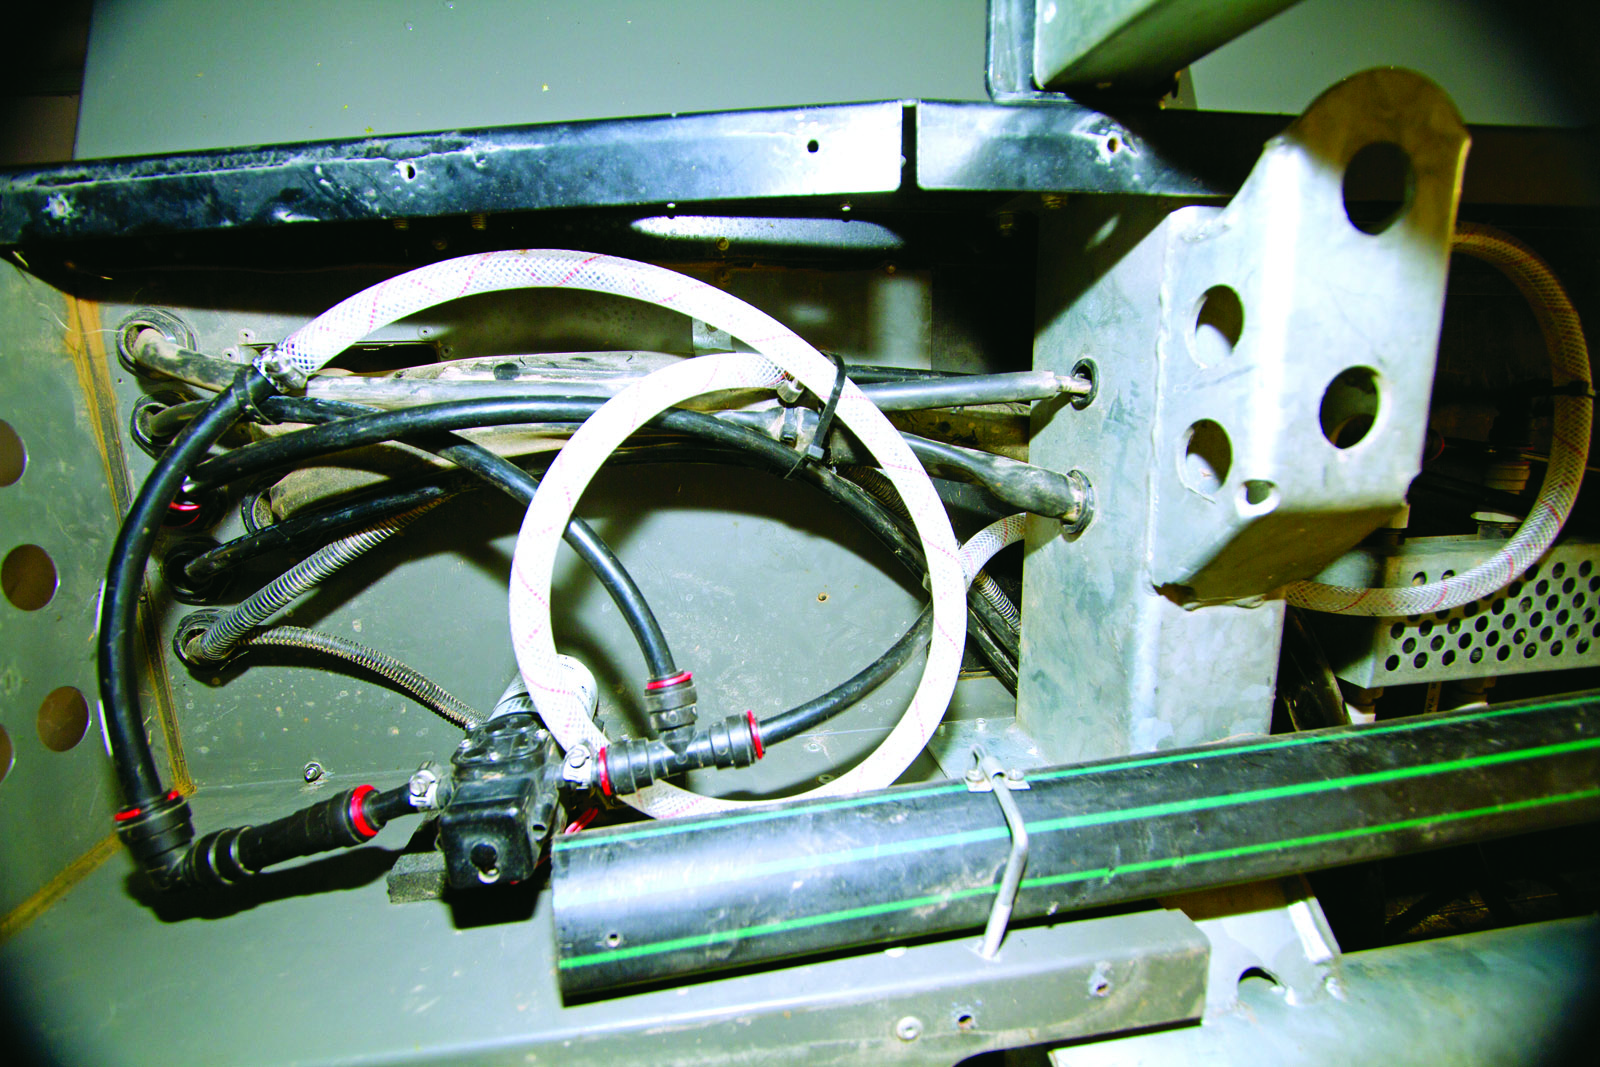
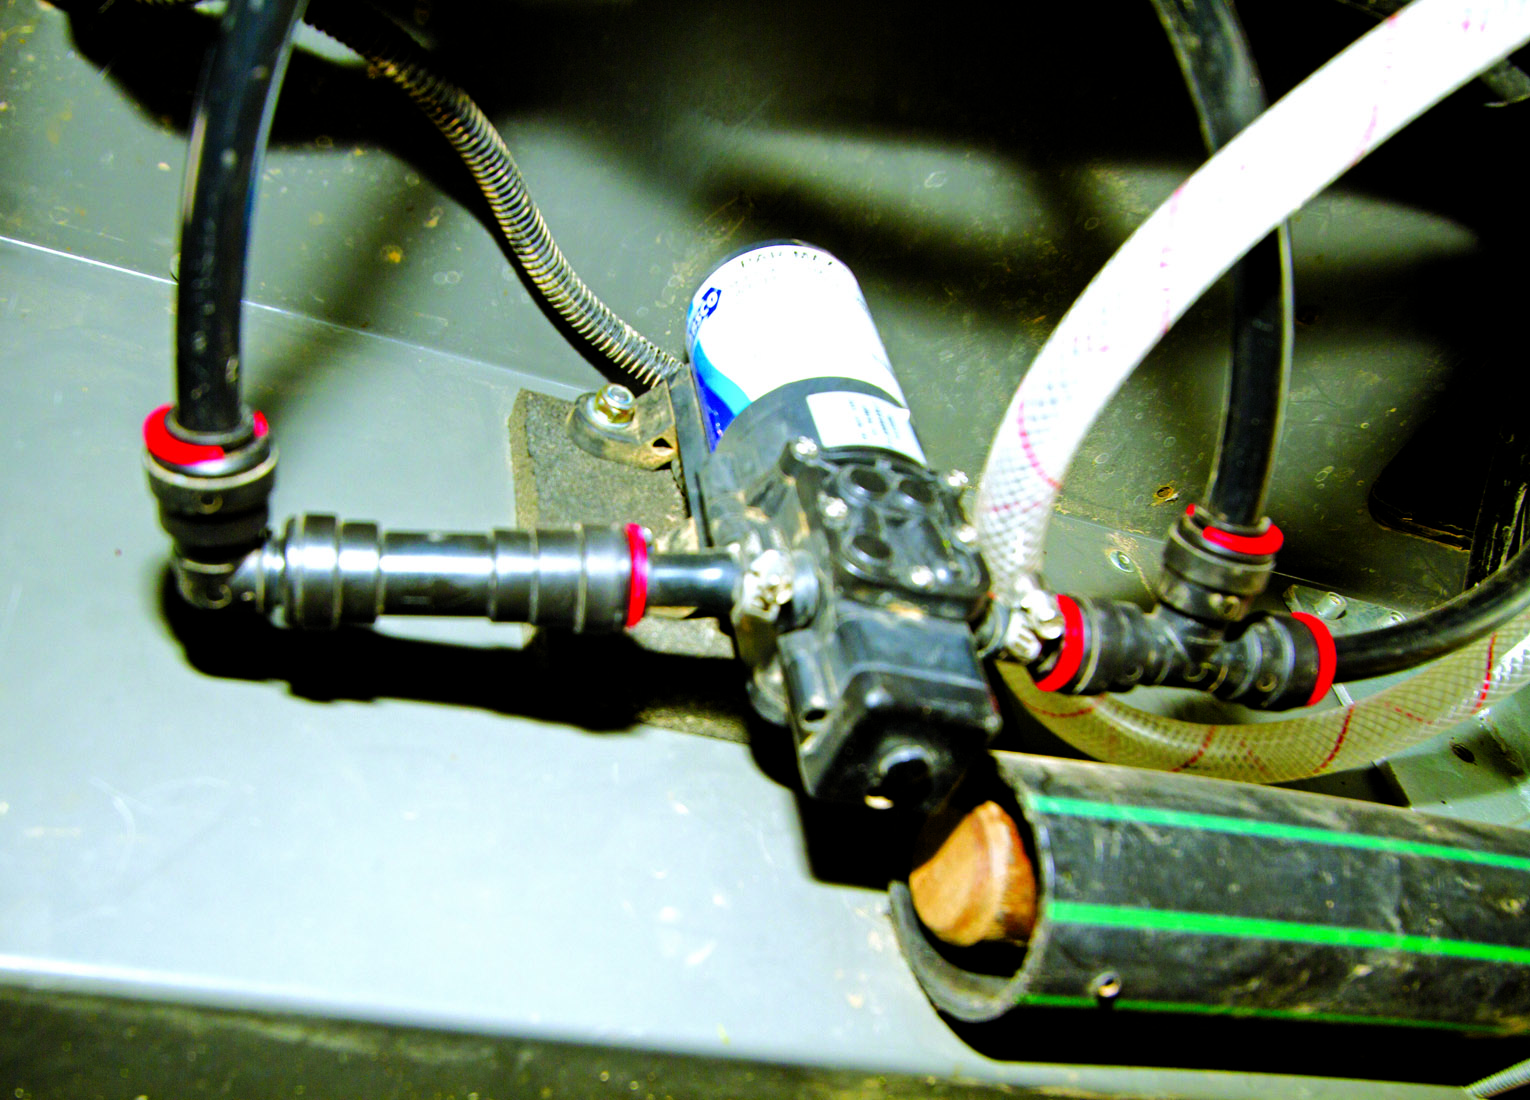
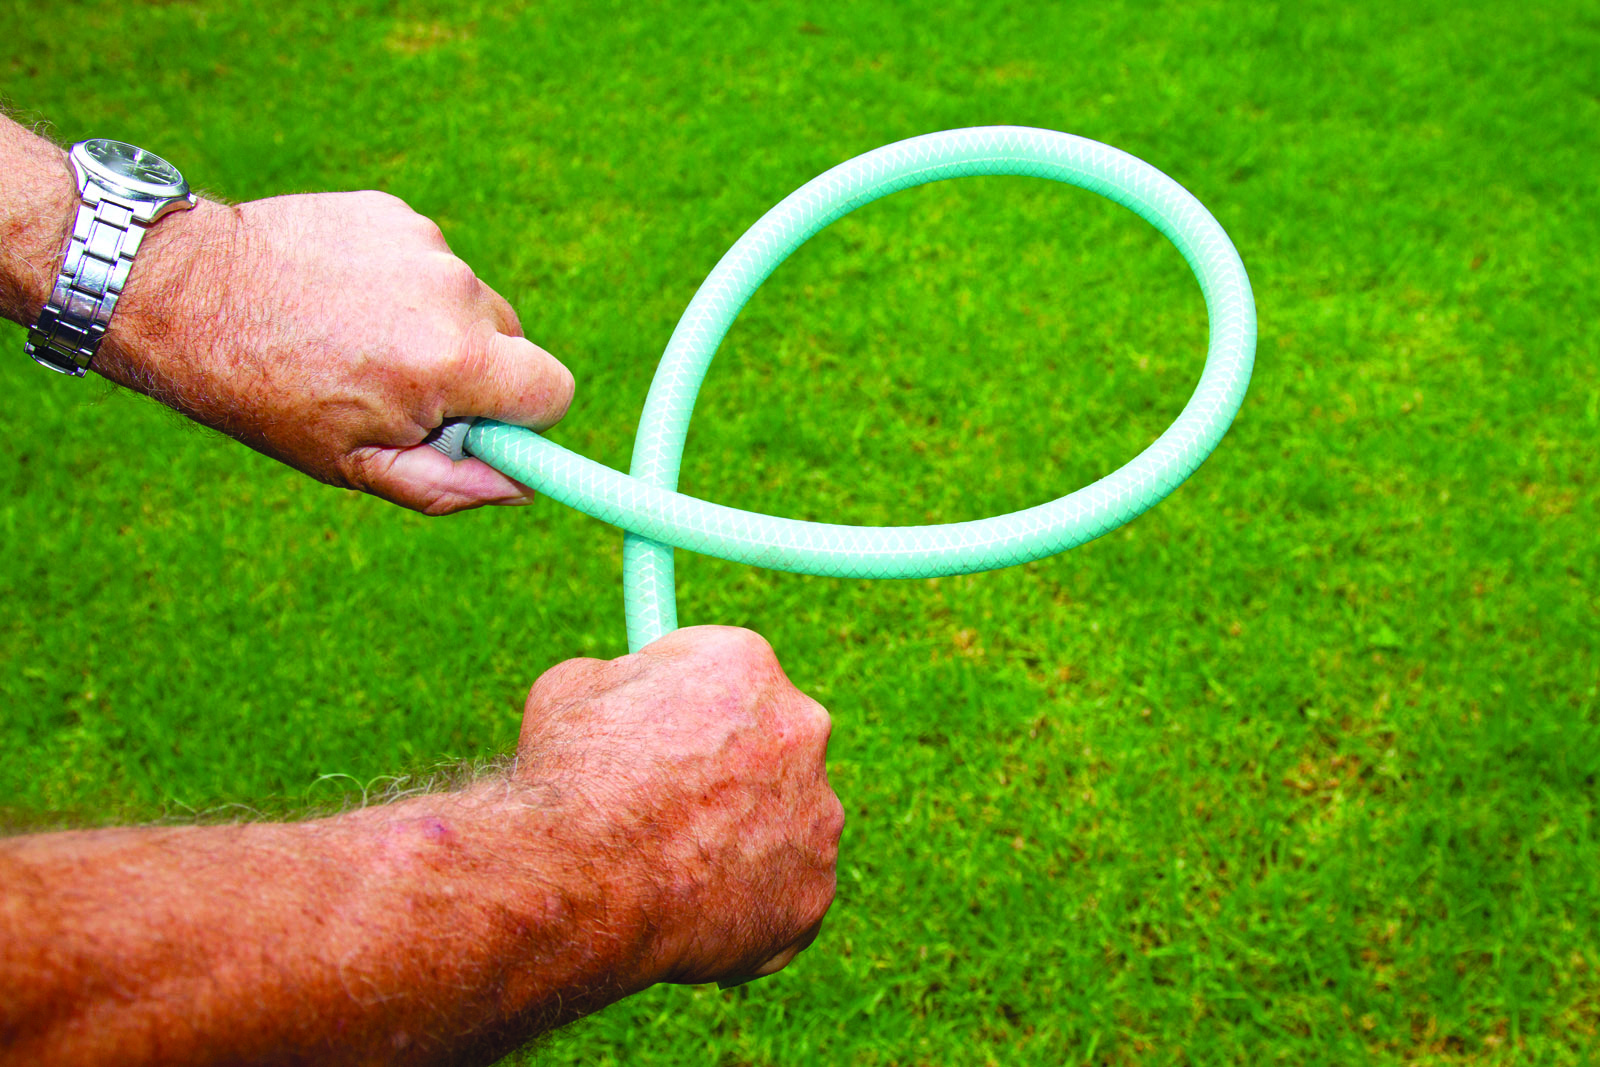
- Use a loop of flexible hose on or close to both the inlet and outlet of the pump. Even the plastic hose used with John Guest fittings – the most common way of plumbing a camper these days – is stiff enough to pass on the pulses from the diaphragm’s motion. Use a length (300-400mm is ideal) of soft food grade plastic hose on each side of the pump, with a good stainless steel hose clamp at each join. Loop the length of hose into a circle so that it can act like a shock absorber to the pulses in the line. Do not secure these hoses tightly to the chassis or structure of the camper. Use cable ties that still have some movement to support the loops of hose and prevent them flopping about and stressing the joins, but you want there to be some lateral movement.
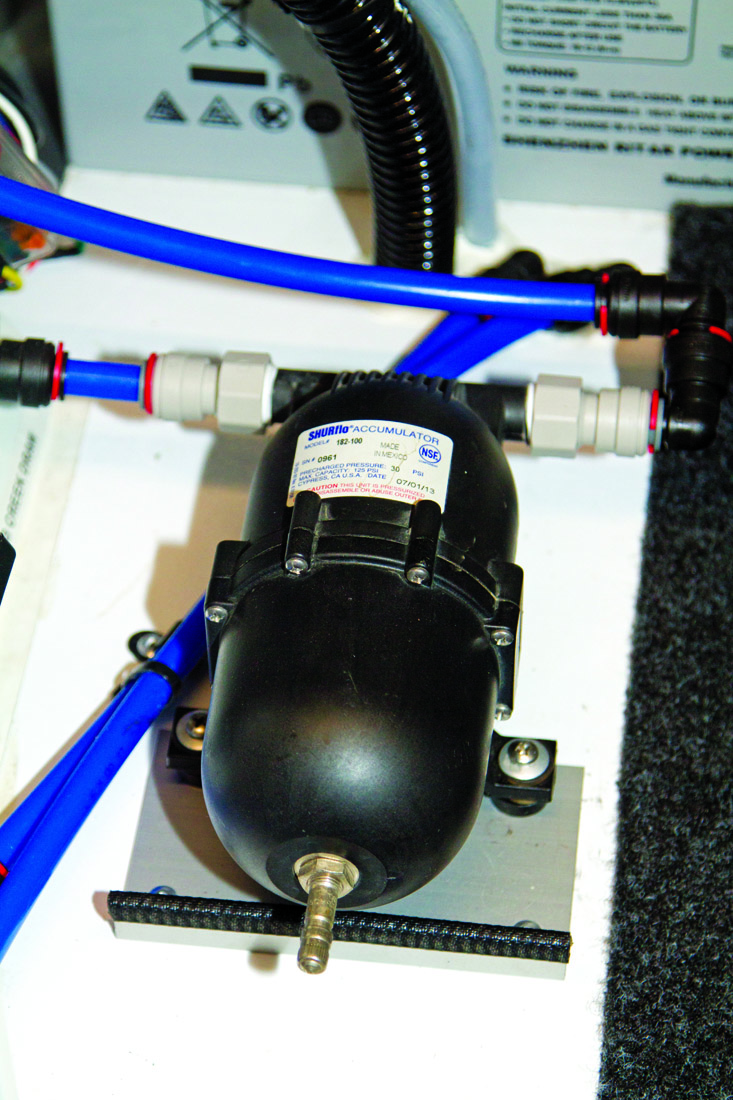
- If you have the room install an accumulator tank (typically they are 120 x 200mm, but will vary greatly from brand to brand). An accumulator tank is a tank that is designed to hold water under pressure. When all you want is a slow and gentle flow you won’t get that throbbing flow at the tap as the pump’s diaphragm pulses, and the accumulator will even the flow to a steady trickle. In smoothing out the flow of the water it helps to dampen the pulses that create the “hammer” effect of associated pump noise.
- Make sure you’ve bled all air out of the system as this can and will create noise. Most pumps these days will self-prime and purge any air in the pipes.
A WORD OF WARNING
At the end of this you should have a water pump that is much reduced in noise, and the whole process should have cost you no more than $30, unless you went for the accumulator option, which will probably add between approximately $40 and $150, depending on brand, outlet and size.
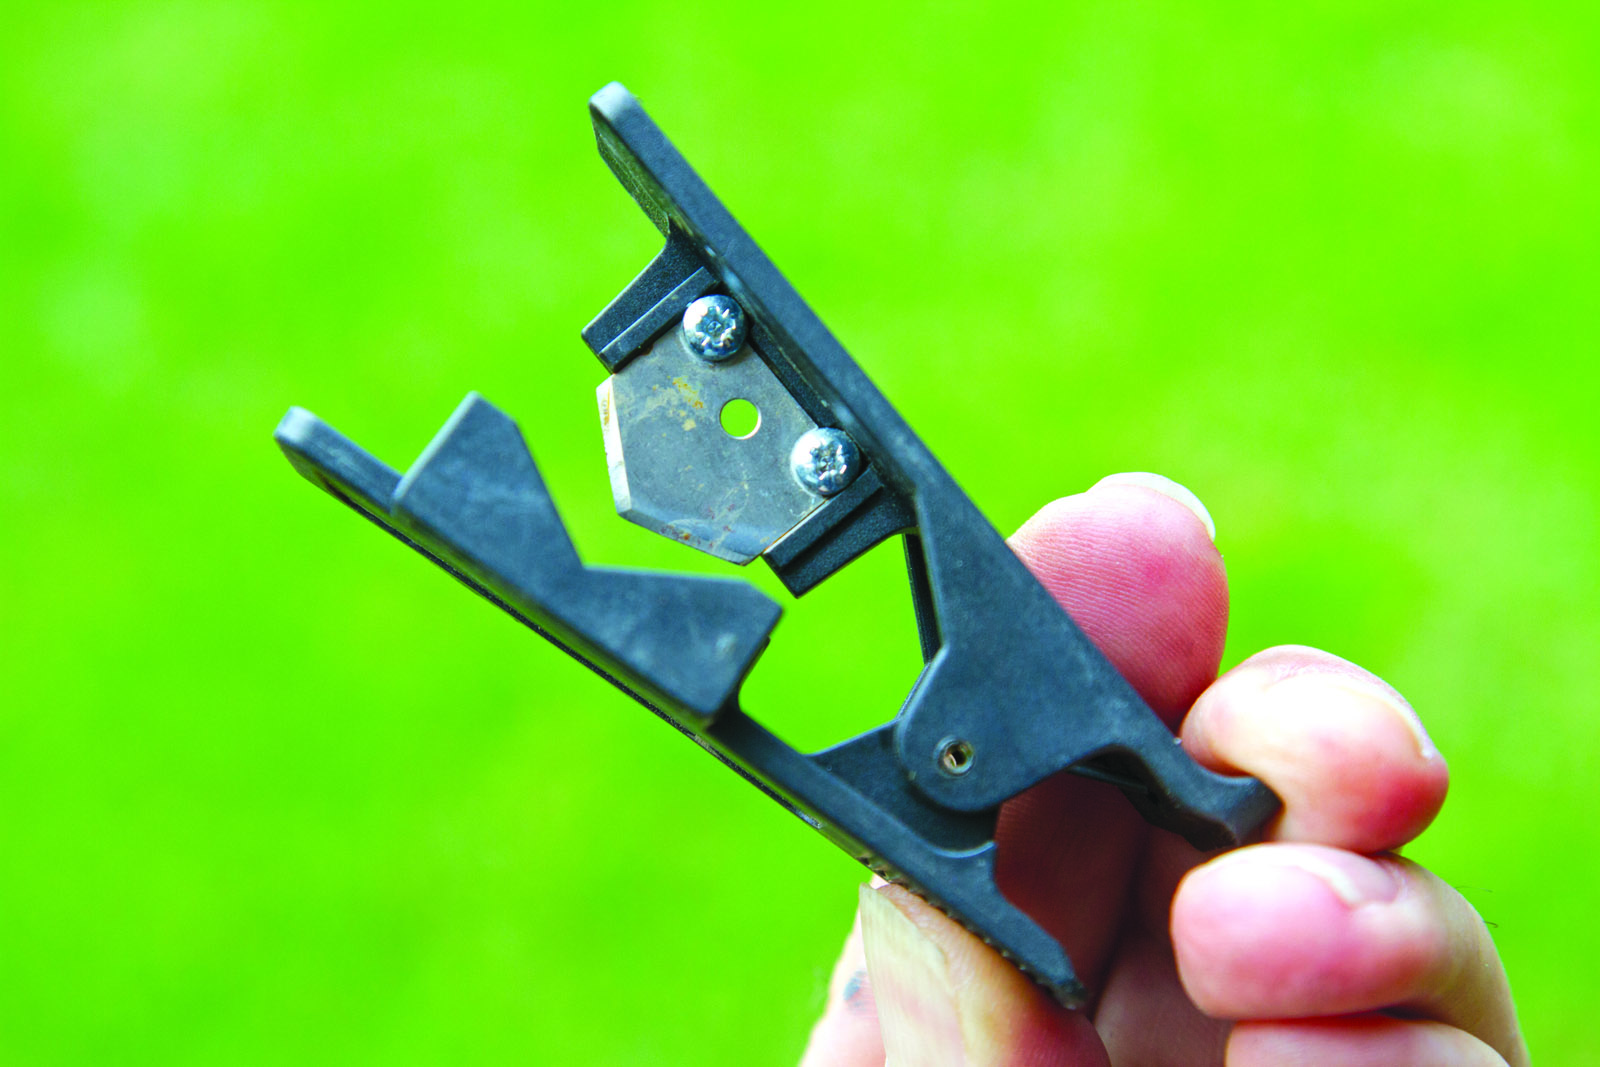
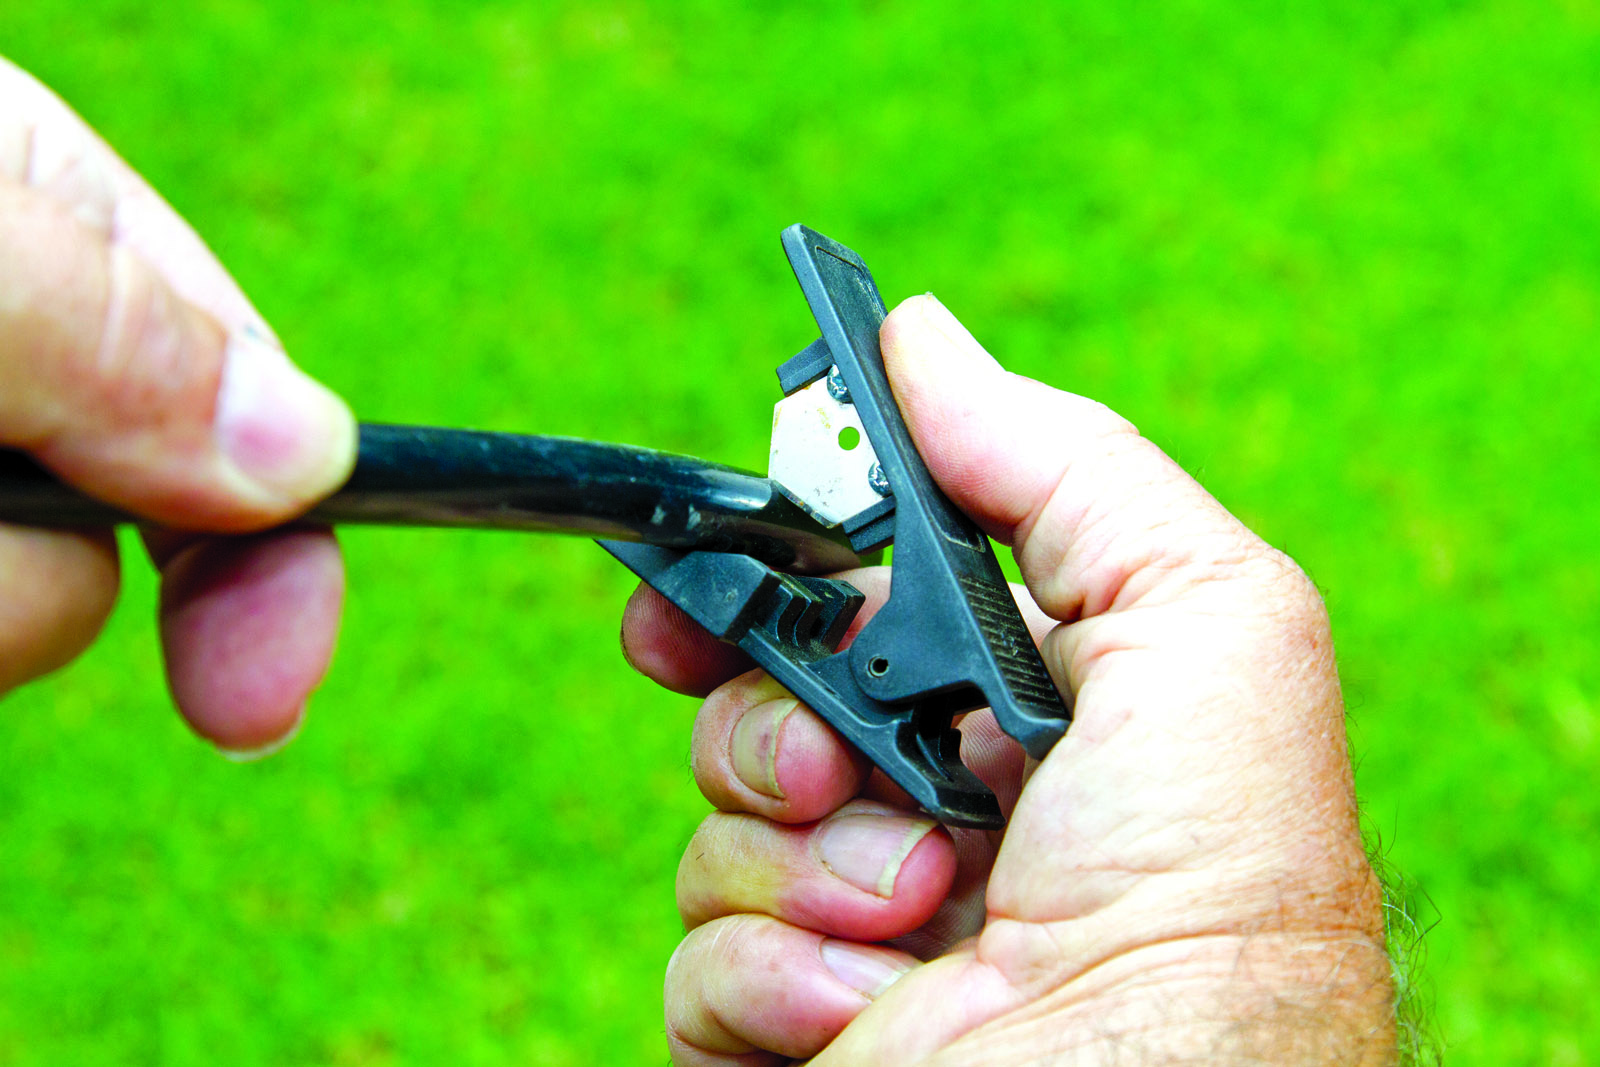
Some warnings though. Firstly, if you are going to be cutting the John Guest plastic hose make sure you use the special cutter (around $15-$20) to ensure you get a sharp and square cut so that the hose seals properly within the fittings (in other words, don’t use a knife or other cutting implement as they will not get you a clean and square cut).
For the flexible PVC hose make sure you use food grade hose (Bunnings sell it in pre-cut lengths of 300mm) as some cheap plastics will break down in time and release toxic materials into the water.
Also, if the food grade hose you use is clear or translucent in any way it may pay to coat it with black plastic paint, as any access of light into a water system will permit algae to grow inside and you’ll have issues with water quality.
Your pump should now not make any more noise than, say, a sewing machine; and it will last longer than before, too.
Now that you have this information, I’m going to be very cross if you wake me at some ungodly hour with a banging water pump.
You have been warned.